Saturday, December 27, 2014

Last Christmas Digital Scrapbook Layout for 2014


Santa Baby Elves  - that comes at Christmas time and checks on the kiddos - to see if they good and reports back to Santa.  :-) .  Created a layout with Santa's Baby (Elf) in one corner, and a snowman in the opposite corner.  

Snowman, Christmas lights, and snowflake from Miss Kate Cuttables, template from PixalScrapper Digital Scrapbooking.  Created in Adobe Photoshop Elements 12.  

Thank you for stopping by to visit with us, and would like to wish all a Happy and fruitful New Year.

Thursday, December 25, 2014

Merry Christmas


Merry Christmas! I hope you have a fabulous day filled with love and family.


 How sweet are these little guys?  I used the colored versions and added glitter and crystal effects to the nose and bells.  I love his little twine bow.
These little mice were just as fun to do, I created the background layers in my SIL program and printed them out as one layer.  I then added Crystal effects and glitter to his hat and another cute twine bow.


I hope these inspire you to get a head start on your cards for next Christmas.  Get started now and you'll be so happy you did.

Saturday, December 20, 2014

Holiday Greetings Layout


Christmas Trees and Holiday Greetings brushes from Adobe Photoshop Elements 

Now, I would like to wish all a Merry Christmas or Happy Holidays and happy crafting.  Hope 'n pray the New Year will bring wonderful memories for you all.  Me -- I will be a great grandma again in July, 2015; and a granddaughter getting married in September, 2015.

Thank you for stopping to visit with me, and have a great weekend.

Saturday, December 13, 2014

Saturday, December 6, 2014

Elf Winter Layout

 
From Santa Baby image file

Recipe:
  • Girl Elf from Santa Baby Set
  • Tag from personal embellishments stash
  • Frame from Make the Cut software library
  • Christmas tree and holly brush from Adobe Photoshop Elements 12
  • Adobe Photoshop Elements 12 for coloring image and editing.
Thank you stopping by to visit with me today, and hope you have a day full of happy crafting.

Saturday, November 29, 2014

Tom Turkey Recipe Card


Abode Photoshop Elements 12

Using  Tom Turkey I created a recipe card for a recipe book that I will be creating for two granddaughters as wedding gifts.  The main recipe card design and wordart from Kimeric Kreations "Cool Eat's" scrapbook kit using Abode Photoshop Elements for editing.

Thank you for visiting with me today, and have a happy day of crafting.


Saturday, November 22, 2014

Tom Turkey (Thanksgiving) Layout

Abode Photoshop Elements 12


A quick layout using Tom Turkey for main featured piece.  The grunge frame and ribbon are brushes from the brush section in Adobe Photoshop Elements; and the pie, rolling pin and pumpkins from Cool Eats Scrapbook Kit.

Thank you for visiting with me today, and have happy crafting day.


Thursday, November 20, 2014

Merry Grinchmas


I am using the fun Merry Grinchmas file, I am a huge fan of The Grinch!  I love the original cartoon and really enjoy the movie with Jim Carey.  I watch it several times a year, even at other times.
I know, I'm a goof.
 I found this neat file in the SIL store and thought it would be fun to display my Grinch.
 I used Lisa's colored version, adding some glitter to his hat and the present's ribbon.


Thursday, November 13, 2014

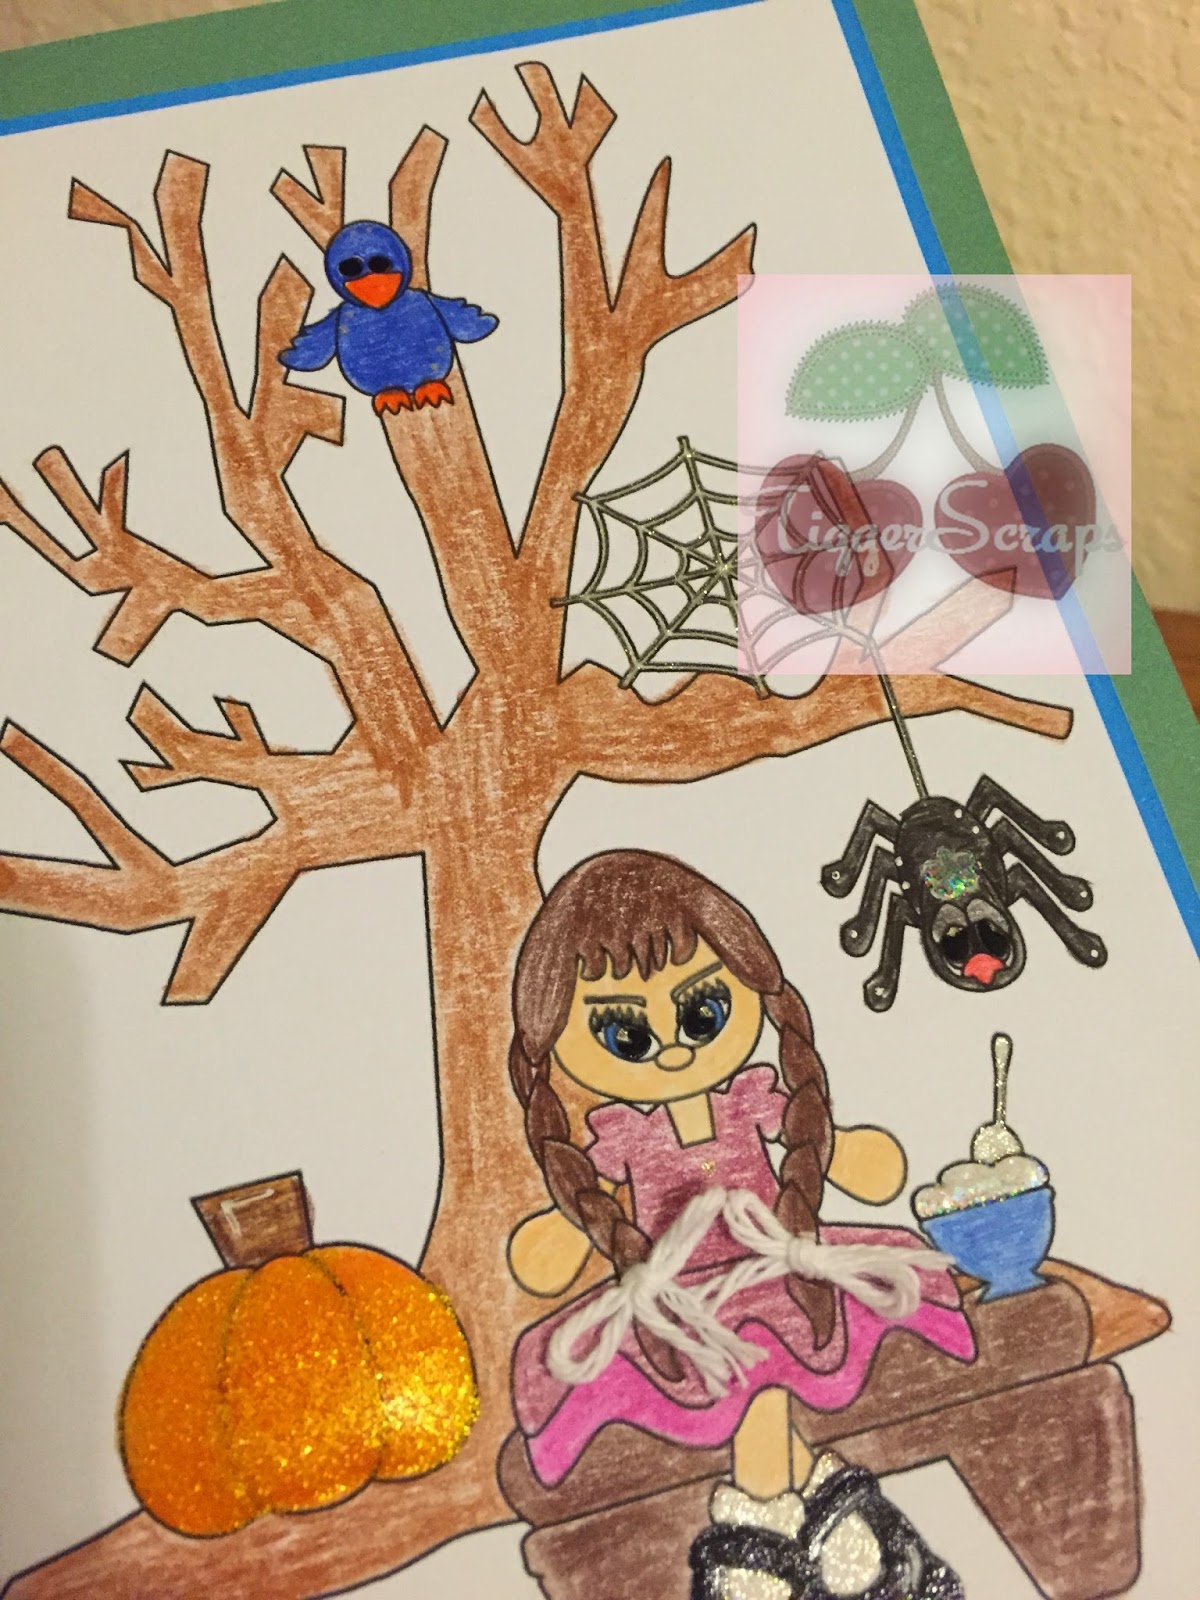
Little Miss Muffet by Marji


Went a little outside the box on this one I think.  After I got this image I was looking around for ideas and saw this card on the SIL site.
I immediately thought spider web!
So after I cut the card I sprayed it with my peal shimmer mist.

I colored her with my pencils then added some white Trendy Twine bows to her braids.
I added glitter to the pumpkin with crystal effects and used my glitter gel pen for the spider web and his little "hair tuft.

Saturday, November 8, 2014

Going a Little Nutty

Hi Carolyn here posting from El Paso, Texas and while I was creating another digital layout, I thought to myself - why not create a digital layout for my Saturday posting so here is what I came up with....

 
 Going a Little Nutty
Squirrel with Sunflower
from


This can be resized and made into a card and add a photo inside the frame as well as being a scrapbook layout for a child's scrapbook.  

Thank you for stopping by to visit with me use here at Sunsational Stamps; and take a few minutes and stop by Carolyn's blog at Granny Ma's Creative Blog.  And have a happy crafting weekend.

Friday, November 7, 2014

Welcome Fall

Hello I'm filling in for Rhonda she is having some issues that have caused her to be away for a bit.
Today I created a Fall card using  the Scarecrow digital image from Lisa's other store
  Scrapping With Lisa's Designs


 I colored him with Bic Markers and then used green and brown ink around the edges of the image. For the top layer I used my Cricut Explore and Design space. to create it. Using a word art printable I fond online at Blooming Homestead. Imported it into design space  flattened it and wrote it on a 3.75 x 5.25 mate then cut an oval from the center and placed it over my image backed it with a piece of brown  card stock an 1/8 of an inch larger all around used some brown decorative ribbon and attached it to a 4x 5.5 white card. The acorn embellishment was created with my cricut as well.

Hope you like my Fall card
Big Blog Hugs, Janet

Thursday, November 6, 2014

Beehive spinner card by Marji


How fun is this card?  I am really tickled with this! 
Finally something that worked on paper as well as it did in my head.
I used a circle spinner card file I had in my sil program, laying the files over the png versions of the beehive image.  I cut it twice, one full circle then one with the spinner track cut out.
I then cut the bee on a simple circle and mounted the spinner using a penny so it will move.

Saturday, November 1, 2014

A final Halloween card to close of the Holiday

Our dear Design Team Member Carolyn Ackerman is busy with family at the moment so I have put together a little card for you!
I used one of Lisa's new designs ( sorry don't have a name for her at the moment) Lets just call her the Caramel Apple Girl for the moment!
I used  my crayola pencils to color her and added some Glass Effects hopping to get her caramel to glisten. the picture doesn't show it very well.
The card is 5.5 x 4 inches and I used an orange mat that I ran through a candy corn Cricut Cuttlebug embossing folder. the sentiment is from CTMH Perfect Fit Halloween stamp set. The rest of the paper were scraps from my stash! and the ribbon was from Michael's dollar ribbon bin.

Hope everyone had a great Halloween and are ready for the Holiday season to begin!!

Have a great day!!
Big Blog Hugs, Janet


Saturday, October 25, 2014

Heidi Under Tree

Good morning from Carolyn --- I am here with my project for this Saturday morning, using Heidi eating her caramel covered apple.


Heidi with Apple

I used the banner title 'Give Thanks' from Angela Creaion's scrap kit: Thanksgiving Fun Scrap Kit; and paper background from Give Thanks Scrap Kit.  Right now I'm not able to locate where I downloaded the Fall tree and fence with rake and pumpkins.

Using Abode Photoshop Elements 12 I created a scenic front to the card, placing Heidi eating her Apple in front on foam tape.  This was layered onto brown Kraft cardstock than onto brown.

Thank you for stopping by and give me a visit at Granny Ma's Creations.  Happy crafting day to all.

Thursday, October 23, 2014

Gobble til you wobble


 I've got 3 cards to share with you today.

First this poor guy has realized his time is up...sure hope the family enjoys him.

 For all 3 of today's cards, I colored them in my SIL program.  I love using the different patterns to color the images in.  Makes it so much more fun I think.

 This guy is as proud as he can be! I created the bow with the long tails to highlight him, I created a sparkle tape "log" for him to sit on.  

And finally, today my husband and I celebrate 14 years of marriage. 
When I saw this image I knew I had to use it for him, so he will be getting this card now, lol
 I added crystal effects to the moon then lightly sprinkled some yellow glitter and then some tiny pink hearts.  I also glittered the pumpkins a little.  Can't be too sparkly for him.

Saturday, October 18, 2014

Heidi with Apple

Carolyn back with a new digital stamp review - love this image and great to create with. Next one I will create with is Heidi sitting on a fence, chair or in front of a fence...

Here is my card I created:


Supplies used:
  • 5x7 Modern Stationary by Spellbinders Card Creator
  • Image from Scrapping With Lisa Designs
  • Apple design paper from Pixel Scrapper Digital Scrapbooking
  • Red and clear gemstones from my stash 
  • Copic and Bic Mark It markers used for coloring
  • Cardstock is actually Smooth Construction Paper that looks and feel like cardstock 
Thank you for coming by to visit with us, and happy crafting to all.

Thursday, October 16, 2014

Sweet Snowman


 I have all of these kits from CTMH so I decided to use one of the cards to show case this adorable snowman.  I added the dark lines around him with my black gel pen, added some glitter and a cute pom pom to his hat.
The little jar of snowflakes I found at the dollar tree in the nail polish section.

Saturday, October 11, 2014

Crows


Supplies used:
  • Cardstock from my stash
  • Tree and fence cut out using the Silhouette Cameo; and cut files from SilhouetteAmerica Online store
  • The Crows image cut out using the Silhouette Studio DE print 'n cut feature
  • I used Prismacolor and Spectrum Noir markers for coloring.
  • Black brads from Stampin! Up
  • Happy Halloween sentiment from Teeny Tiny Words stamp set from Stampin! Up
Carolyn
Granny Ma's Creations

Saturday, October 4, 2014

Scarecrow Watching his Pumpkins

Good morning crafters, Carolyn here to share another Fall/Halloween card, using the Scarecrow Digital Stamp Image


Layered design paper  and cardstock onto a Kraft cardstock and than using the  Scarecrow Digital Stamp Image which I colored with (I believe) Bic Mark-It markers on the design paper (sorry no Fall type paper in collection) and print and cut the fence with pumpkins using the Print n Cut feature in Silhouette Studio DE, after playing around with the pieces to create the image.  The crow is from the library in Make the Cut software which I had cut out several of this little fellows.  Placed a gemstone for an eye.  On the fence/gate where there was circles to indicate it nailed together, I punched holes with my hole punch, and placed bronze colored brads.  The three pumpkins at bottom, I may have cut this out with my new Cricut Explore Print then Cut feature and place two of three on foam tape.  As for a sentiment, I will place that once I know who will be receiving this card.

Thank you for stopping by to visit with us here and for more inspiration, please visit my blog at Granny Ma's Creative Blog.

Saturday, September 27, 2014

A Halloween Treat Box

Hello crafty friends, Carolyn here to share a treat box with a Scarecrow that I created for a gift for my granddaughter....


Supplies used:
  • Scarecrow Digital Stamp Image
  • Treat Box from SilhouetteAmerica Online Store
  • Bic Markers for coloring
  • gems from my stash
  • spider web embossing folder used to embossed the mat on tombstone front
  • Trick or Treat sentiment from SilhouetteAmerica Online Store
  • Score tape for adhesive tape
Thank you for stopping by to visit with us; and check out my blog at Granny Ma's Creative Blog

Thursday, September 25, 2014

Home sweet home by Marji


 I'm on vacation in Hilton Head this week, I did not get the time I thought I would to create my project so I did this on using my SIL program and the shapes and patterns I have in there.  I used our super cute owl, "colored" him in with some fun patterns and colors and placed him in a fun little tree house.
Isn't he cute?  I love the crazy stuff you can do with digital stamps.


Saturday, September 20, 2014

Sam - only as Samantha Snowman


Here is another card topper using  SS-105 Sam Snowman acrylic stamp set.  I drew in eyelashes, hoping to give it the appearance of a Samantha.  Colored the scarf and cap a olive green, with a darker shade of green to create a striped  scarf.  I placed the stamped image onto Snowman design paper that I found in my stash of paper.  Than the sentiment was printed out and than punched with a scalloped circle and placed on a strip of paper that I made as a banner.  Placed on side using foam tap.  I matted with shades of blue card stock and than the design paper.  

Thank you for coming by for a visit, and happy crafting to you all

Friday, September 19, 2014

summer card- Rhoda


Hello and welcome to the weekend and the ending of summer. I wanted to make a last card for summer and I think it turned out so cute. I used a digi stamp from Sunsational Stamps but i am unsure if it is in the store right now.


Please feel free to stop by my blog to see more pics and a few details.

Thursday, September 18, 2014

Fancy girls by Marji


I had so much fun with these stamps, I pulled out one of my Close to my Heart paper packs I've been saving, and went crazy!
 I stamped her on the tan, on purple designer paper and on the snake skin type paper then cut out the pieces.  Her eyes I colored with a black gel pen and used my white gel pen for the stitching and high lights.
 I added lots of gems and pearls, I think she's fabulous!! I hope you agree.

For this fancy girl, I stamped her on the Raspberry paper then again on the plaid and cut just her wing from the plaid and stamped her on the white panel.  Her body and beak tip were cut from the raspberry paper.
 I cut rectangles from the designer paper and tied some twine around them for gifts and cut her bum a bit so it looked more like she was sitting on the gifts.  She's so fashionable I think.